My full-size oven takes 20 minutes just to preheat. In a 650 square foot apartment, that preheat also turns my kitchen into a sauna. So most weeknights, I was not even turning it on. I was microwaving leftovers and getting the soggy results you would expect, or I was standing over a pan of oil on the stovetop making a mess I did not want to clean up at 7 PM after a long day. Then I started using a 2.6-quart compact air fryer instead, and I have not touched the oven for anything under a pound since. Here is exactly how I get crispy, golden results every single time without it.
This guide walks through five steps I follow every time I cook in a compact air fryer. Whether you are making wings on a Tuesday night, crisping up leftover pizza, or roasting a sheet pan's worth of broccoli in two batches, the process is the same. The air fryer I use is the Dash Tasti-Crisp 2.6-quart. I picked it because it fits in one cabinet shelf, costs under $30, and has a 4.5-star rating from over 34,000 buyers who are mostly people in the same boat as me. I will link it below. But the steps here apply to any compact model.
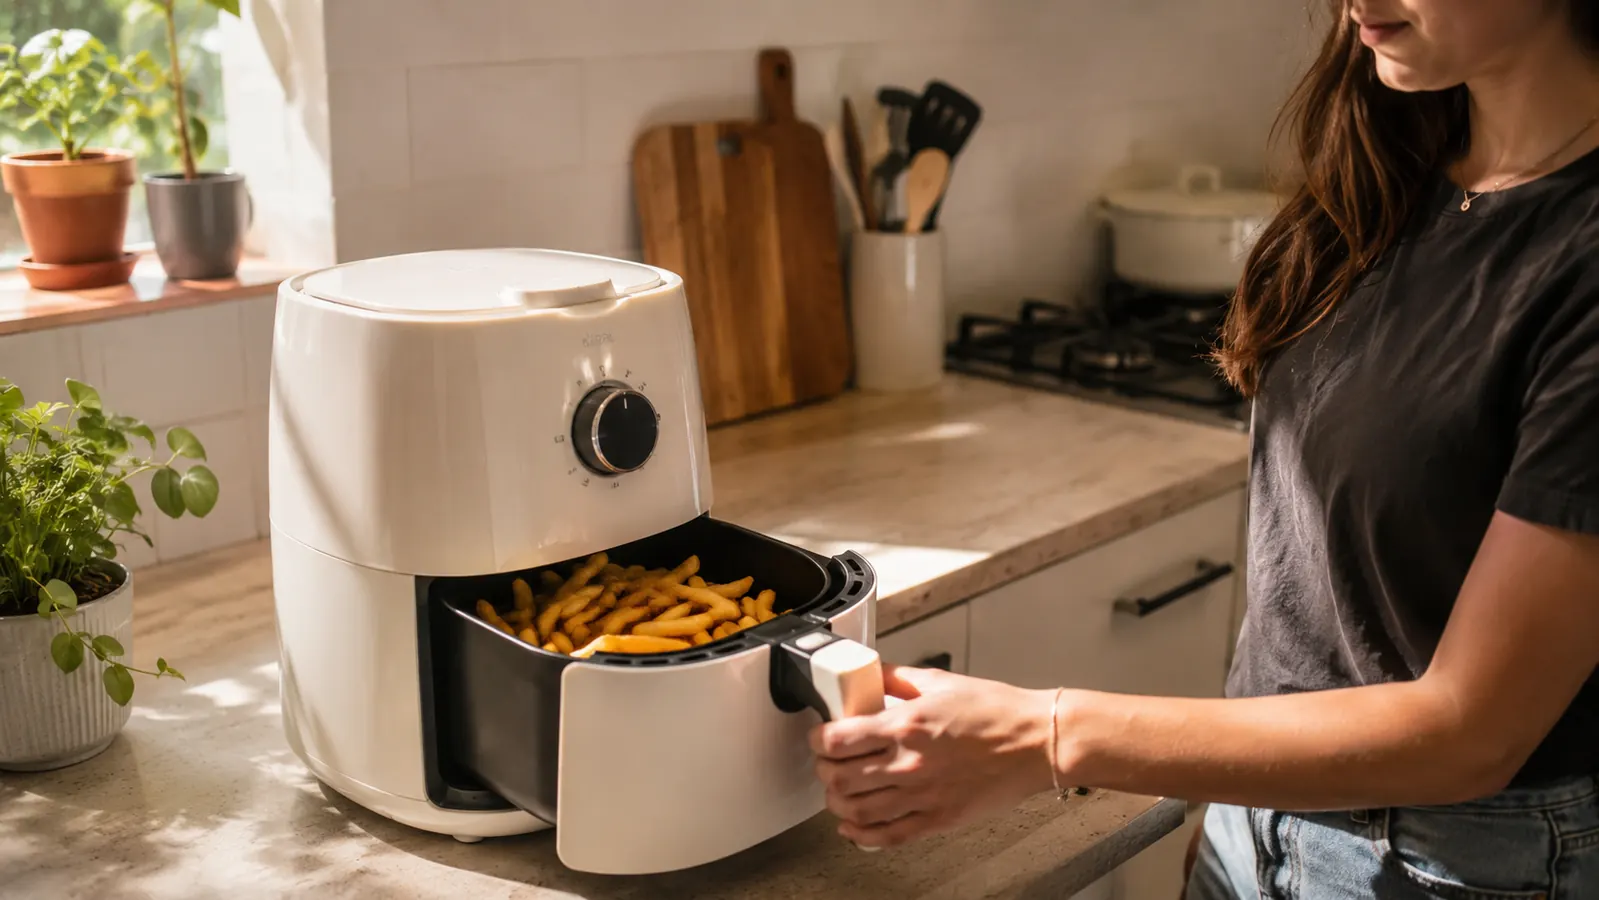
Skip the 20-Minute Preheat. The Dash Air Fryer Is Ready in Under 3 Minutes.
A compact air fryer fits on one shelf, plugs into any outlet, and starts cooking almost instantly. No heating up the whole apartment. No waiting around. The Dash 2.6-quart is the one I use every week.
Amazon Check Today's Price on Amazon →Step 1: Pat the Food Dry Before It Goes In
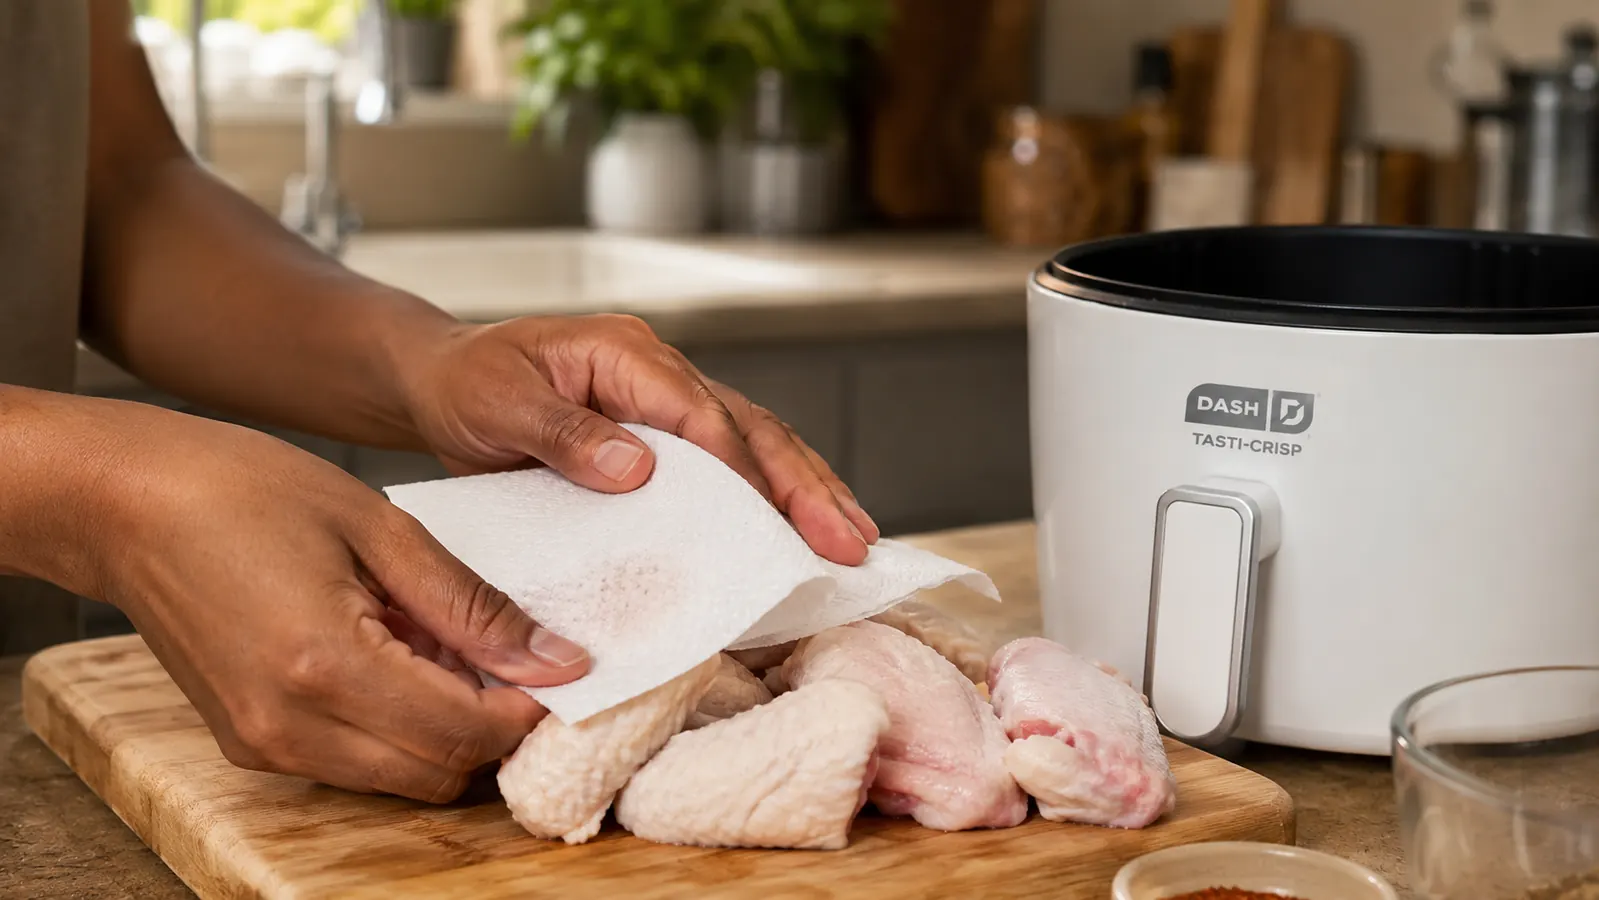
This is the step most people skip, and it is the main reason their food comes out pale and soft instead of golden and crispy. Moisture is the enemy of browning. When you put wet food into a hot air fryer, the surface steams instead of crisps. You end up with cooked food, but not crispy food, and there is a real difference between the two.
Grab a paper towel and pat whatever you are cooking until the surface feels dry to the touch. This matters most with chicken wings, fish fillets, and any vegetables that release water as they cook. Fresh broccoli, zucchini, and mushrooms all have high water content. A 30-second dry-off before seasoning makes a noticeable difference in the final texture. For frozen food that goes straight from the freezer, skip this step because the surface is already dry.
Do not skip this with chicken, even if it looks dry coming out of the package. The surface usually holds some moisture from the packaging. Pat it down and you will see the difference in your results within the very first batch. This single habit is what separates a good cook from someone who swears their air fryer does not work.
Step 2: Use a Light Coat of Oil, Not a Heavy One
Air frying is not the same as deep frying, and you do not need much oil at all. But you do need some. Completely dry food can come out unevenly browned and a little tough on the outside. A very light coat of oil helps the surface crisp evenly and gives the seasoning something to stick to so it does not fall off in the basket.
I use an oil sprayer because it gives me a thin, even layer without any pouring. If you do not have one, drizzle a small amount into your hand and rub it over the food, or use a pastry brush. For a full basket of wings or fries, about one teaspoon of oil is enough. Avocado oil and light olive oil both handle the heat well at air fryer temperatures. Skip butter entirely because it will smoke and burn at the temperatures you are using, and it will fill your kitchen with an acrid smell.
For frozen foods like egg rolls, tater tots, or frozen fries that already have oil incorporated into the product, you can usually skip the added oil entirely. They are pre-oiled and will crisp on their own just fine. Adding more oil to frozen processed food mostly just makes things greasy.
Step 3: Do Not Crowd the Basket
Hot air needs to circulate around the food to crisp it. When you pile too much into the basket at once, the pieces overlap and trap steam between them. The result looks like what you would get from a microwave, not an oven. This is the number one mistake people make with a compact model, especially a 2.6-quart basket, because the capacity is genuinely small and it tempts you to overfill.
For a 2.6-quart air fryer, think of the basket as good for one solid serving. Six to eight chicken wings. One generous portion of fries. Two portions of roasted vegetables spread in a single layer. If I am cooking for my whole family, I do two or three batches and keep the finished food warm on a sheet pan in the actual oven set to 200 degrees while the next batch runs. The total time is still shorter than waiting for the full oven to preheat, heat the food through, and cool back down before I can use the kitchen again.
Hot air needs to circulate. One layer in the basket, every time. That is the single rule that changed my results more than anything else.
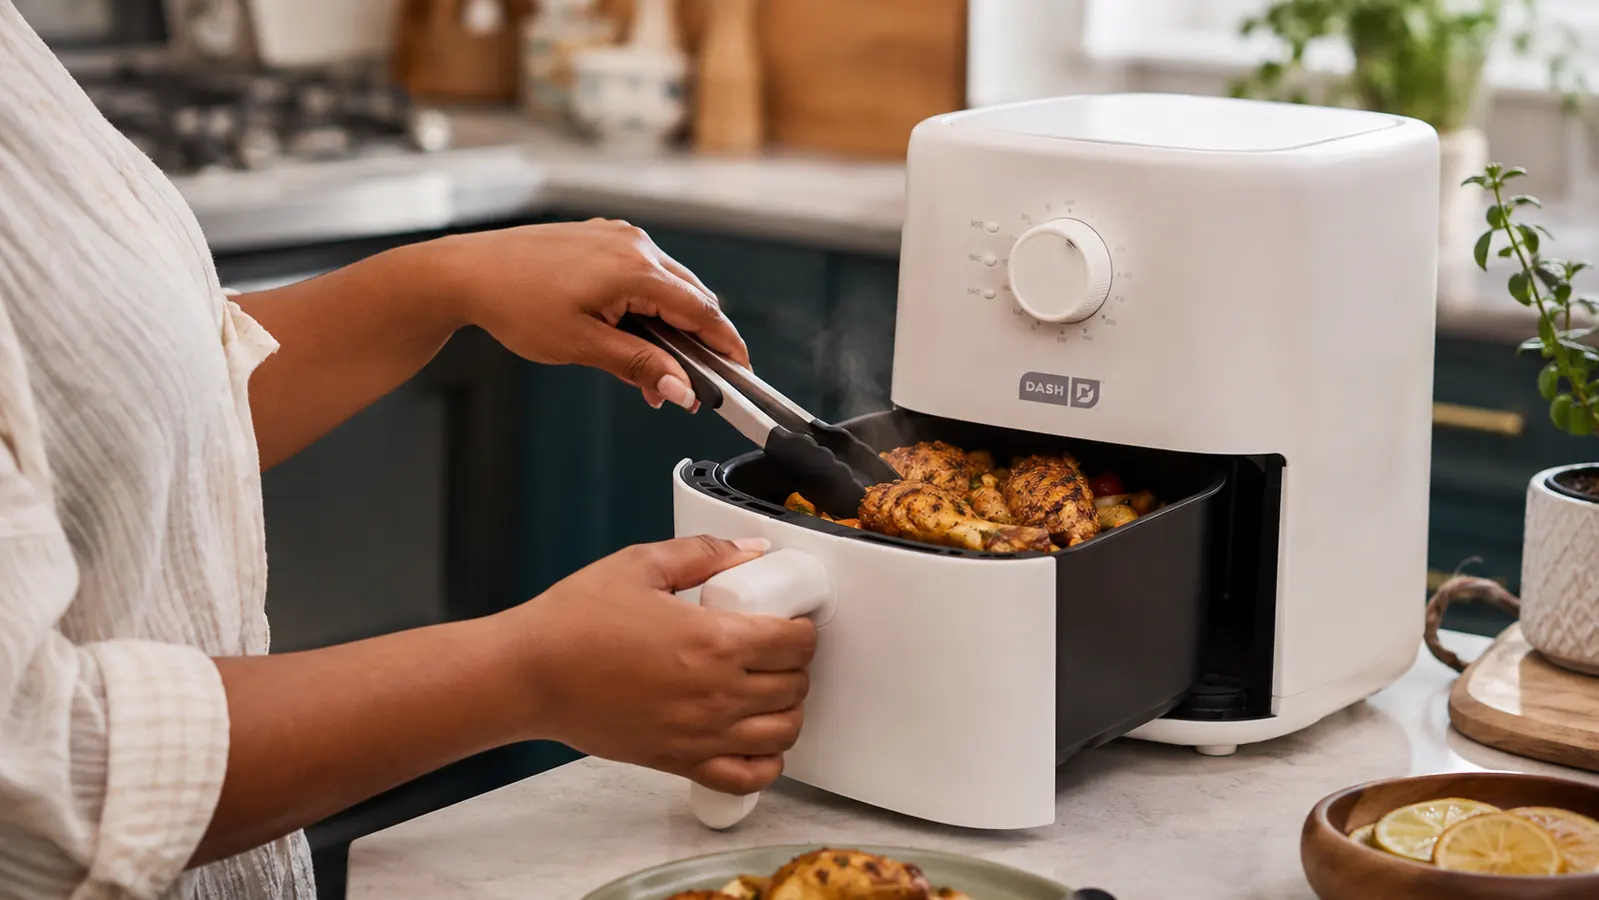
Step 4: Flip or Shake Halfway Through
The air fryer circulates heat from the top heating element. The bottom of whatever you are cooking gets indirect heat from the metal basket. That means one side will brown faster than the other if you leave it alone the entire time. Flipping or shaking at the halfway mark evens out the color and texture on both sides.
For fries and small pieces like tater tots, roasted broccoli florets, or diced sweet potato, pull the basket out and give it a good shake so the pieces redistribute. For wings, fish fillets, or anything with a clear top and bottom, flip each piece with tongs. Set a timer for half the total cook time and do the flip when it goes off. Then put the basket back in and let it finish. You will end up with an even, golden color all the way around instead of dark on top and still pale on the underside.
The Dash model I use has a lightweight basket that is easy to pull in and out quickly. The dial temperature control is simple to bump up by 10 or 15 degrees for the last two minutes if I want a deeper brown on chicken skin or extra-crispy fries. That last-minute temperature boost is a trick I use all the time.
Step 5: Match the Temperature and Time to What You Are Cooking
Air fryers run hot and fast compared to a conventional oven. A temperature that would be medium in your oven is closer to high in an air fryer because the heat is direct and the cooking chamber is very small. Getting the temperature right is the difference between crispy and burned, and between cooked-through and still raw in the middle.
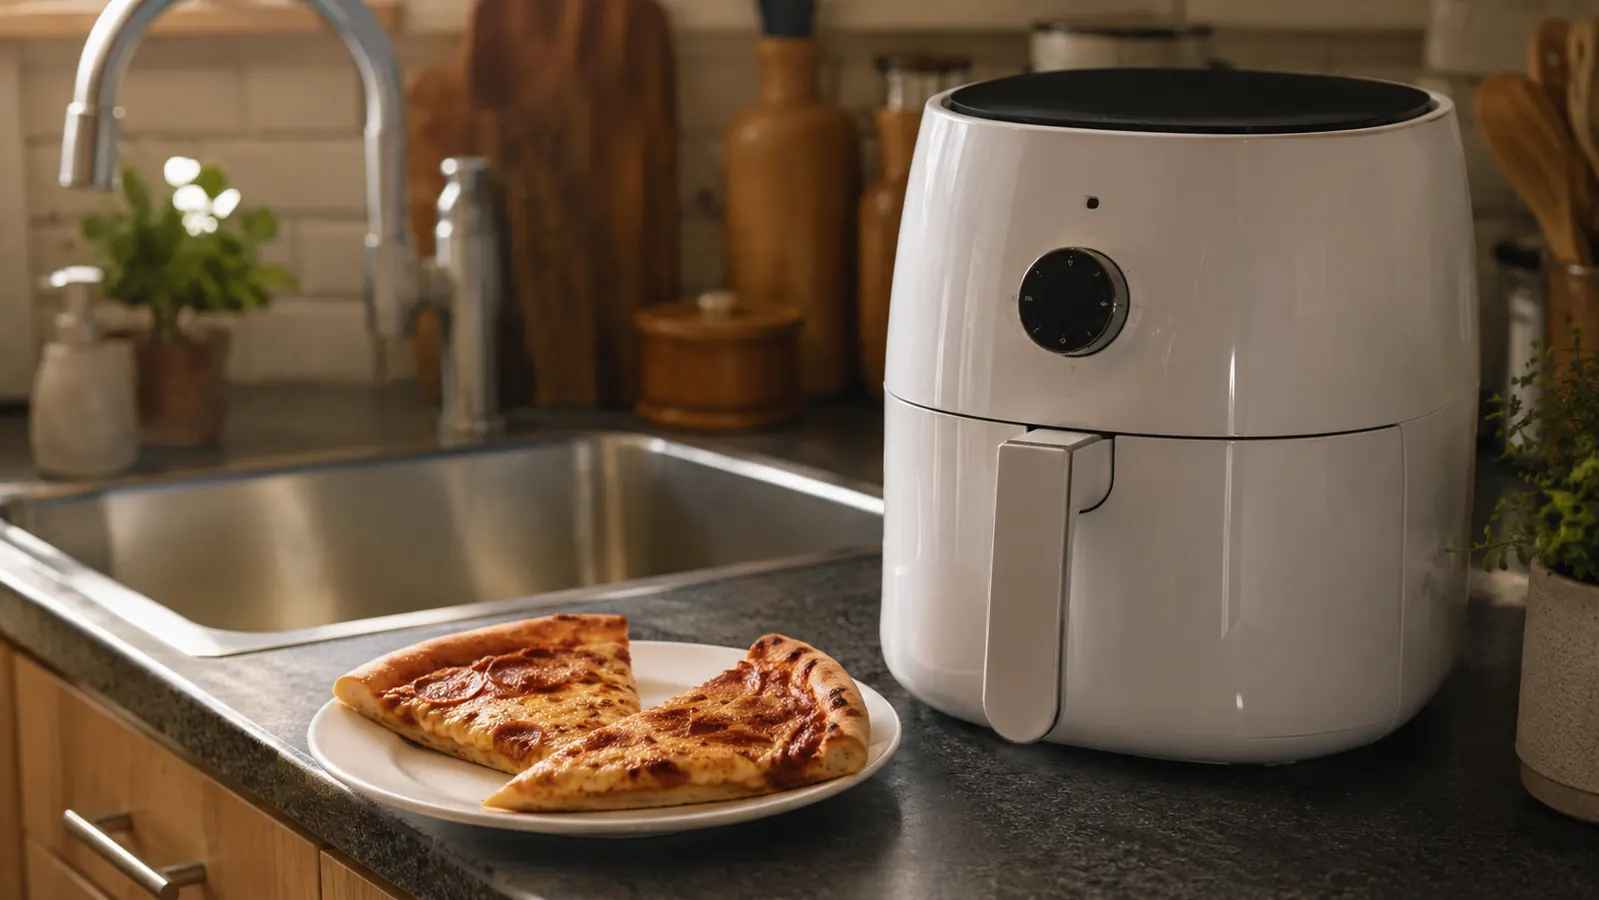
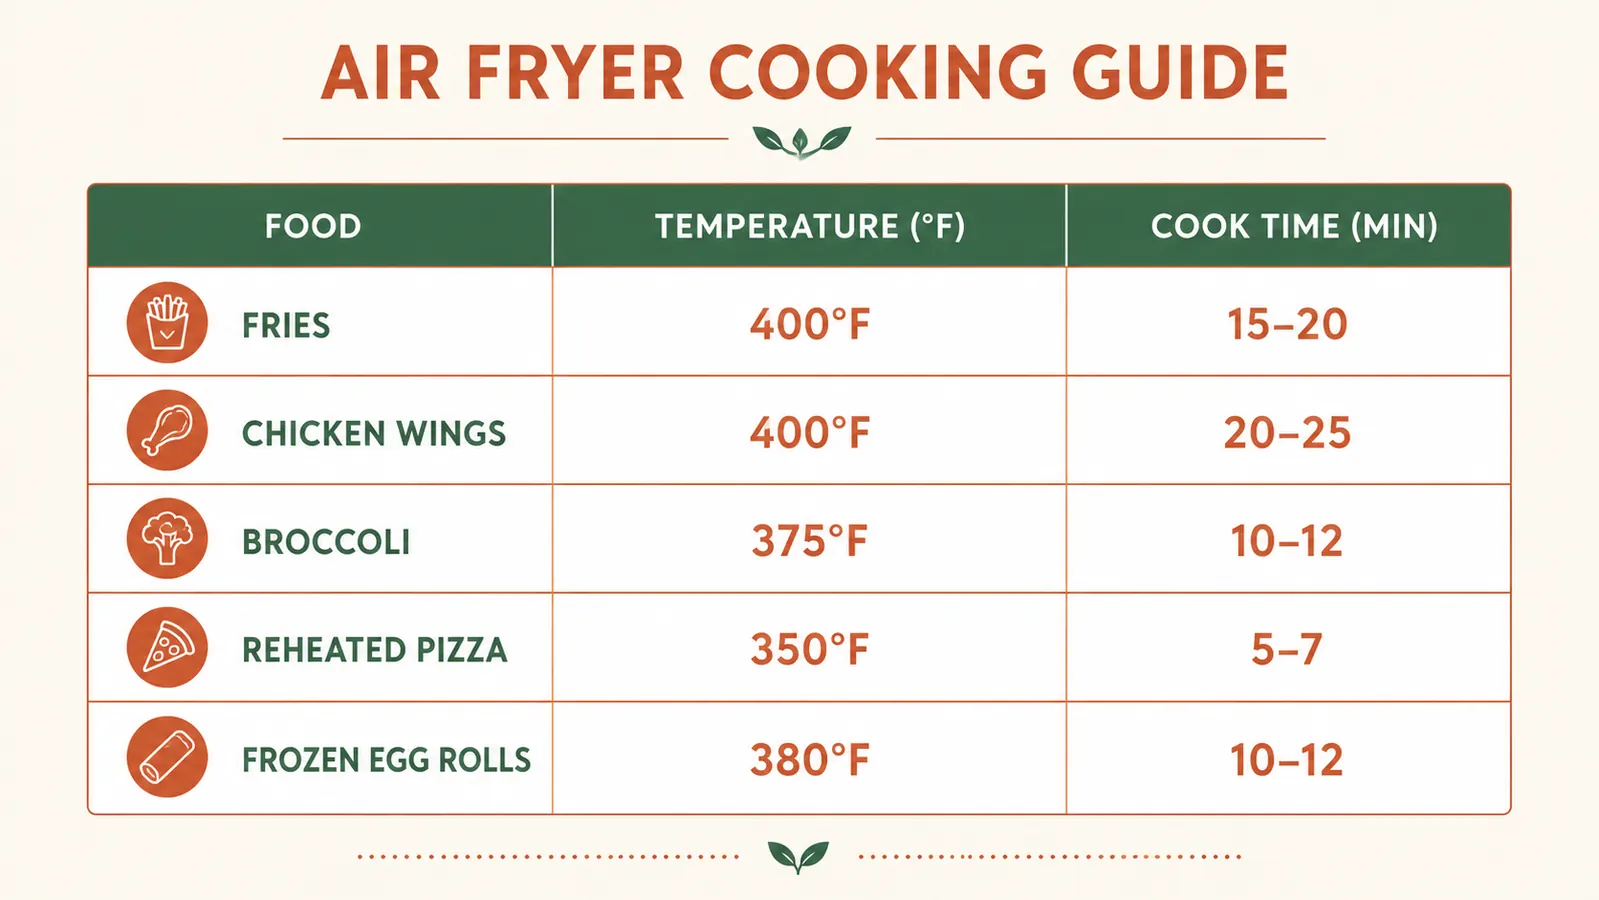
Here is the range I use as a starting point. Thin or delicate foods like fish fillets and fresh vegetables do well at 370 to 380 degrees for 8 to 12 minutes. Thicker items like chicken wings and pork chops want 390 to 400 degrees for 18 to 22 minutes. Frozen convenience foods like egg rolls, tater tots, and frozen fries usually say 400 degrees on the package, and that guidance is reliable. Reheating leftovers works best at 350 degrees for 3 to 5 minutes, which brings back the original crunch without drying the food out or overcooking it.
The chart below pulls this all together in one place. Use it as a reference until you get a feel for your specific model. Every air fryer runs a little differently, so your first batch is also your calibration batch. Check the food two minutes early the first time you try something new, and adjust from there. After three or four cooks, you will have your own mental chart that fits exactly your machine and your preferences.
Quick Reference: Temperature and Time for Common Foods
These are the settings I land on most often with a compact 2.6-quart model. Adjust by a minute or two based on how your specific fryer runs and how crispy you like things. All temperatures are in Fahrenheit.
French fries (fresh cut or frozen): 400 degrees, 15 to 18 minutes, shake at the halfway mark. Chicken wings (thawed): 400 degrees, 20 to 22 minutes, flip at 10 minutes. Broccoli florets: 375 degrees, 10 to 12 minutes, shake at 6 minutes. Frozen egg rolls: 400 degrees, 8 to 10 minutes, flip at 5 minutes. Reheated pizza (1 to 2 slices): 350 degrees, 3 to 4 minutes, no flip needed. Salmon fillet (one portion, about 1 inch thick): 380 degrees, 10 to 12 minutes, flip at 6 minutes. Frozen onion rings: 400 degrees, 8 to 10 minutes, shake at the halfway mark. Diced sweet potato: 380 degrees, 12 to 15 minutes, shake at 7 minutes.
What Else Helps
A few small habits make a real difference once the basics are solid. First, preheat the air fryer for two to three minutes before the food goes in. Most compact models do not have a dedicated preheat button, so I just run it empty at the cooking temperature for two to three minutes first. It is a short wait, and the food hits a hot surface instead of a cold one. That jump-start to the browning is especially noticeable with chicken and fries.
Second, use a basket liner if you are cooking anything saucy or sticky. Parchment rounds cut to fit the basket make cleanup much faster and keep the basket from getting coated in sugary sauces that are difficult to scrub off later. I keep a stack of parchment rounds made for air fryers right in the cabinet next to the machine. One note: never preheat with a dry liner inside and nothing on top of it. Without food to weigh it down, the parchment can fly up into the heating element, which is a fire hazard. Put food on top of the liner before the heat goes on.
Third, clean the basket after every single use. A 2.6-quart basket is small enough to wash by hand in about two minutes. Grease that sits in the basket cooks onto the non-stick surface over time and eventually causes smoking during future cooking sessions. It also degrades the coating faster. Warm water and a soft sponge are all you need with the Dash basket. Two minutes of cleanup now beats a smoky kitchen and a ruined basket later.
If you want to go deeper on whether the Dash is the right model for your specific kitchen setup, my long-term review of it covers eight months of daily use and answers the questions I get most often. I also put together a side-by-side comparison of the Dash versus a few pricier compact models if you are deciding between options and want a head-to-head breakdown. And if some of your meal prep needs are better suited to pressure cooking rather than crisping, the Instant Pot Duo Mini is worth a look for soups, stews, and grains.
Pick One Recipe from the List Above and Try It Tonight.
The Dash 2.6-quart is the model I reach for first. It starts under $30, comes with a recipe guide, and takes up about as much counter space as a large coffee mug. Most people who try one recipe in the first week end up using it five nights a week.
Amazon Check Today's Price on Amazon →